
Hello everyone,
In this article, I will talk about how you can manage access to your EC2 instances in your AWS cloud environment with the principle of least privilege and ensure that users can only access the resources they need, and only for as long as necessary. In other words, I will explain a partial PAM setup.
Before having you read the entire article, let me explain the capabilities this feature provides:
- Eliminates the need for password/ssh-key access on Unix/Linux servers.
- Enables users to create requests for access to servers and provides an approval mechanism.
- Prevents long-term access (such as password or key) to servers. Without needing a VPN, you can grant access to your servers in private subnets for as long as you wish.
- Allows you to create manual approval, automatic approval, or automatic rejection policies for desired servers.
- Lets you receive server access requests via email, Slack, or Teams, and when user requests are approved, ensures that emails are sent to users.
- Enables access to Unix/Linux servers with a different read-only user via Run As. (When directly starting a session, connections were made with the ssm-user with sudo privileges.)
- Lets you record RDP connections to your Windows servers into S3.
- Stores all server requests and access logs in both CloudWatch Logs and S3, encrypted with KMS.
If the above actions meet your needs, you can continue reading the rest of the document. 🙂
The architecture of the diagram:
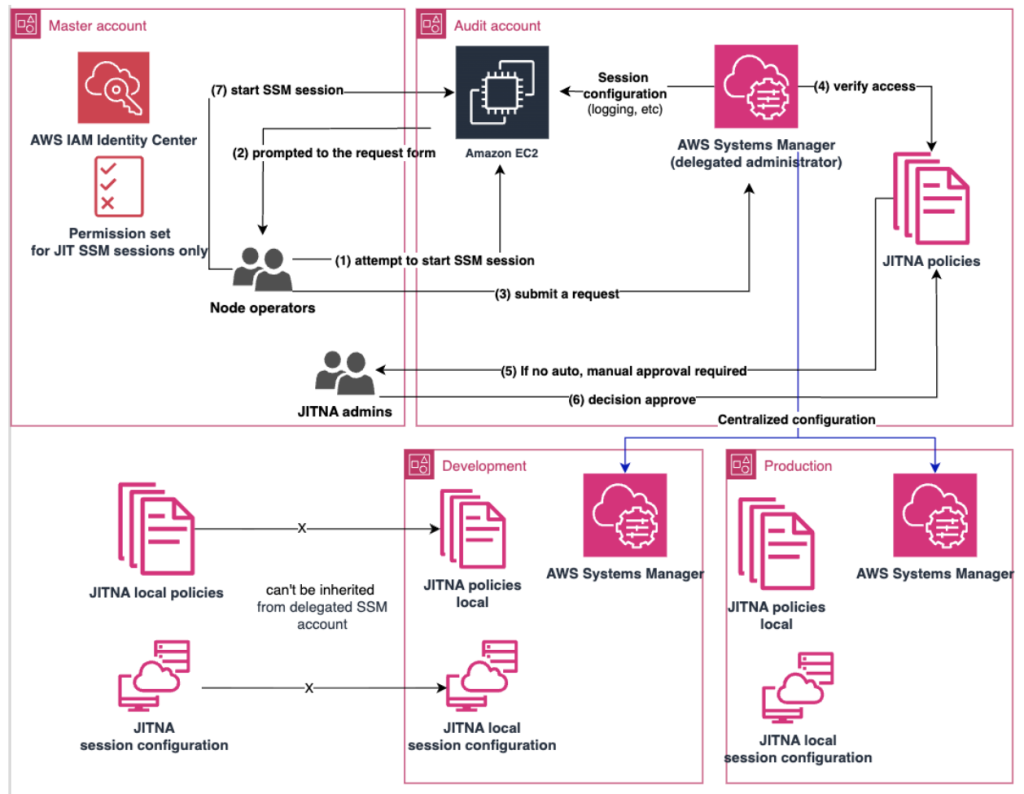
On April 29, 2025, AWS announced the JITNA (Just-in-time node access) feature to meet this need. With this feature, you can use it not only on your servers in AWS but also on your on-premises servers or servers in other cloud providers. The only requirement is that the AWS SSM Agent must be installed on the relevant servers, and the corresponding IAM role or IAM user (if outside AWS) must be defined.
JITNA (Just-in-time node access) is a feature under the Systems Manager service. After the first 30-day trial period, pricing is calculated per managed node. This feature is also regional, meaning you need to enable it separately for the servers in each region.
When you go to Just-in-time node access in Systems Manager and you haven’t used it before, you will be greeted with the following screen:
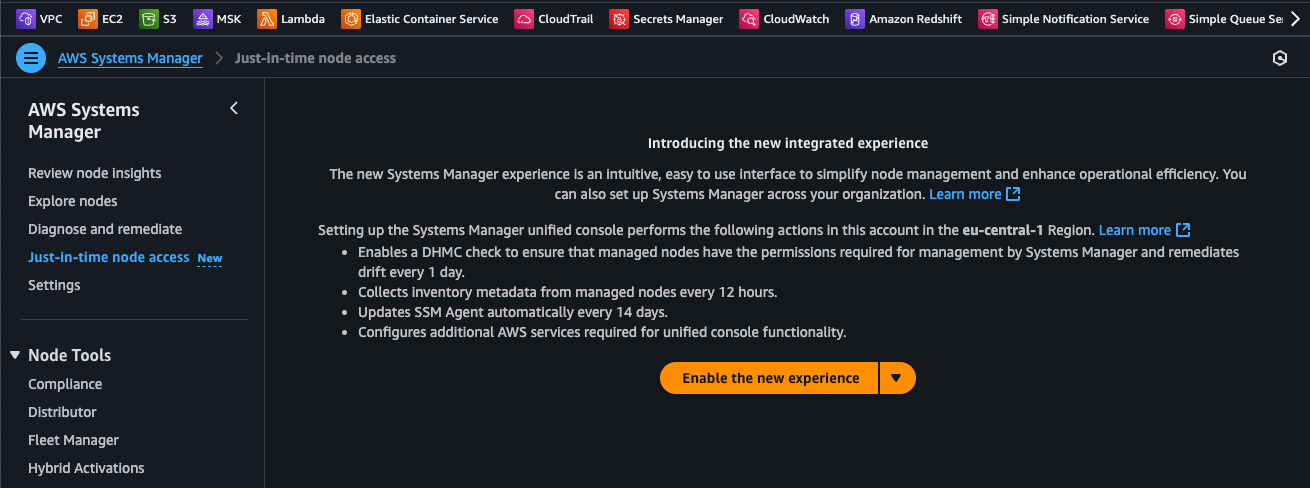
For those wondering, DHMC (Default Host Management Configuration) is a mechanism that ensures the necessary settings for Systems Manager are automatically applied to new EC2 instances or managed servers. Its main purpose is to make EC2 instances or on-premises servers ready to connect to Systems Manager without manual intervention. With this configuration:
- The SSM Agent can be automatically installed (if not already present),
- An IAM instance profile is assigned,
- The permissions required for communication with SSM (e.g., AmazonSSMManagedInstanceCore) are added,
- Servers become visible by default in the Systems Manager console.
When you enable the JITNA feature in AWS Systems Manager, the system performs a number of automated tasks on your behalf:
- First, a special IAM role containing the necessary permissions is created in each target account. This role allows Systems Manager to prepare the infrastructure required for temporary access.
- Then, State Manager is activated in each account, defining a service-linked role that enables Systems Manager to configure on your behalf.
- Additionally, in order to generate temporary security credentials, another association is established through State Manager, and a new IAM role is created for this purpose.
- Finally, an association is set up in the designated delegated administrator account and the home region within your organization. A role is then activated to allow access denial policies to be shared with member accounts.
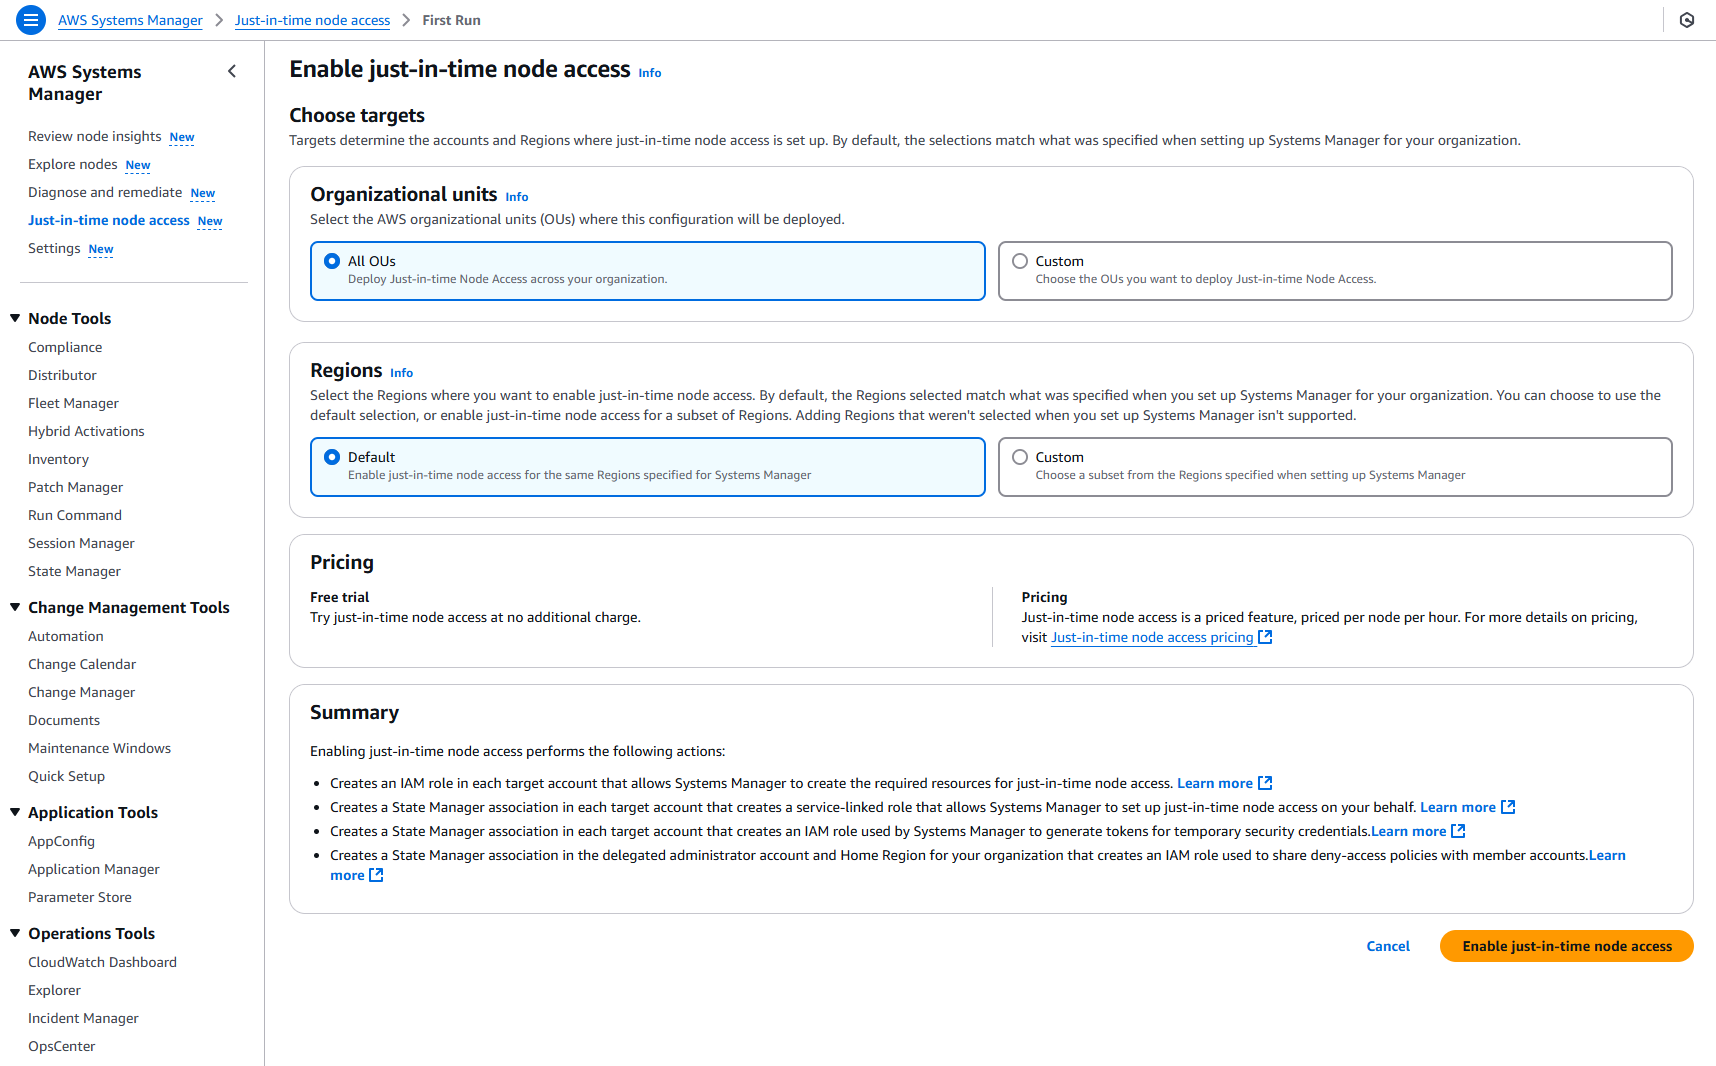
At the end of this process, JITNA automatically prepares all the essential components needed for setup, leaving you only with the task of managing access requests.
After activating the feature, you can also change the periods from the Settings section located at the bottom left.
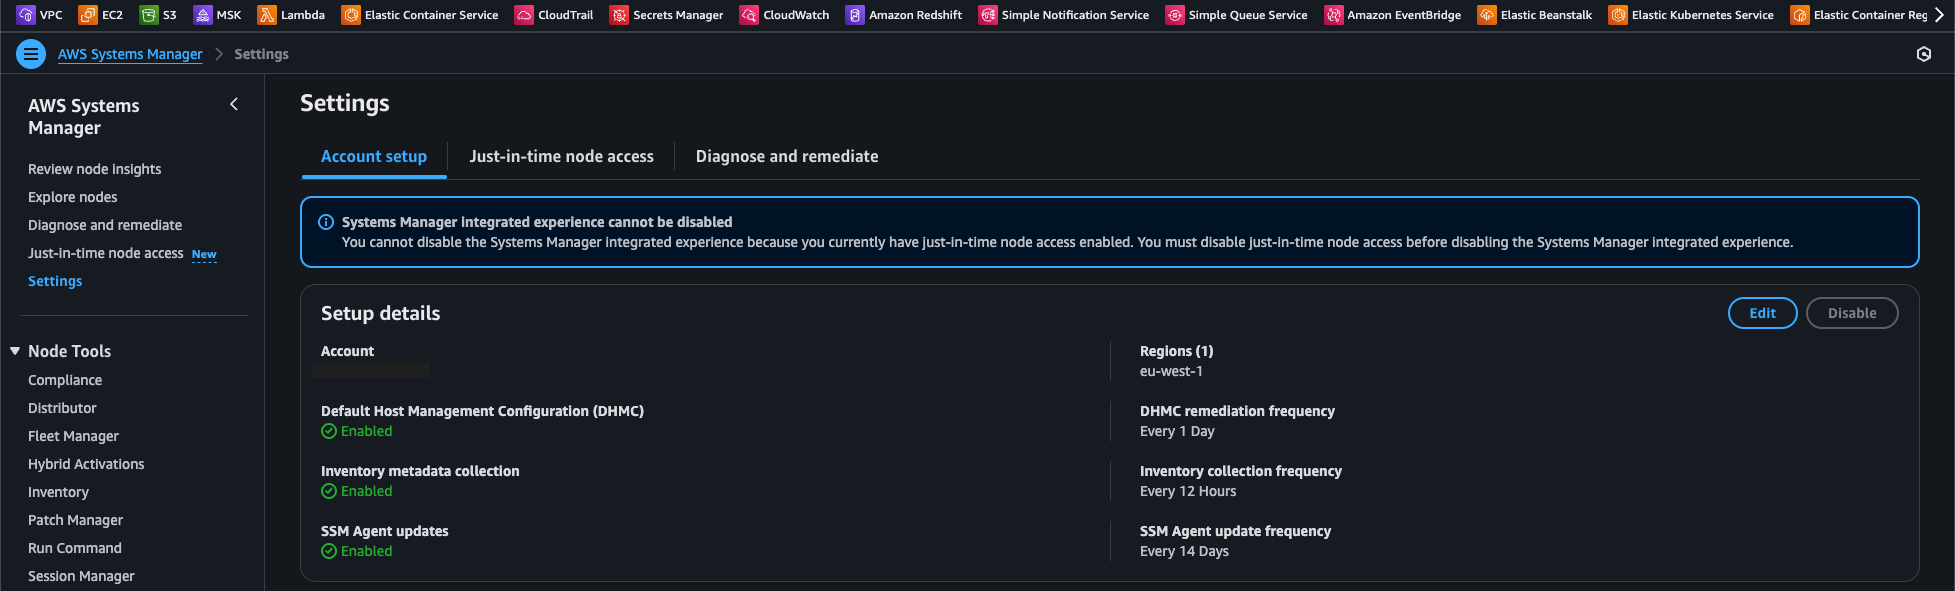
After the initial setup phase is completed, you can see the installation I performed for my environment on the screen below.
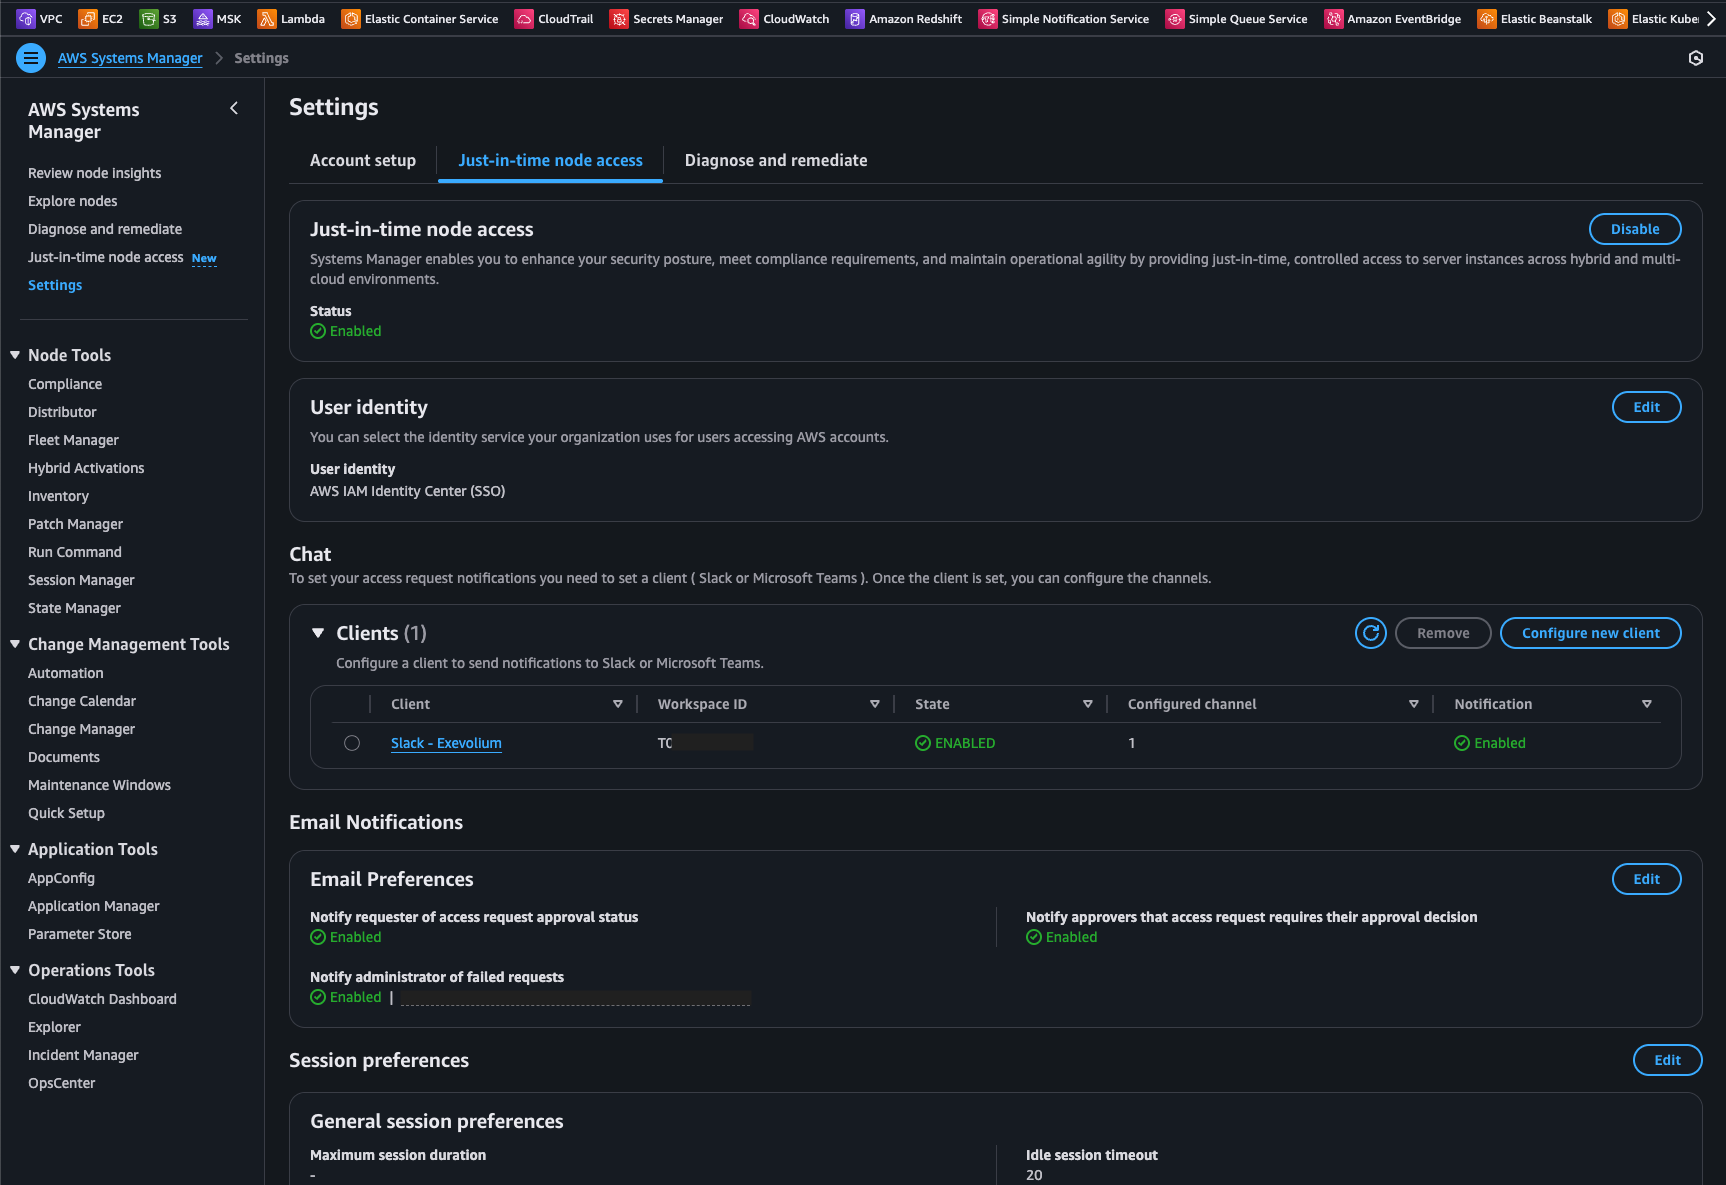
If I were to explain the features mentioned above:

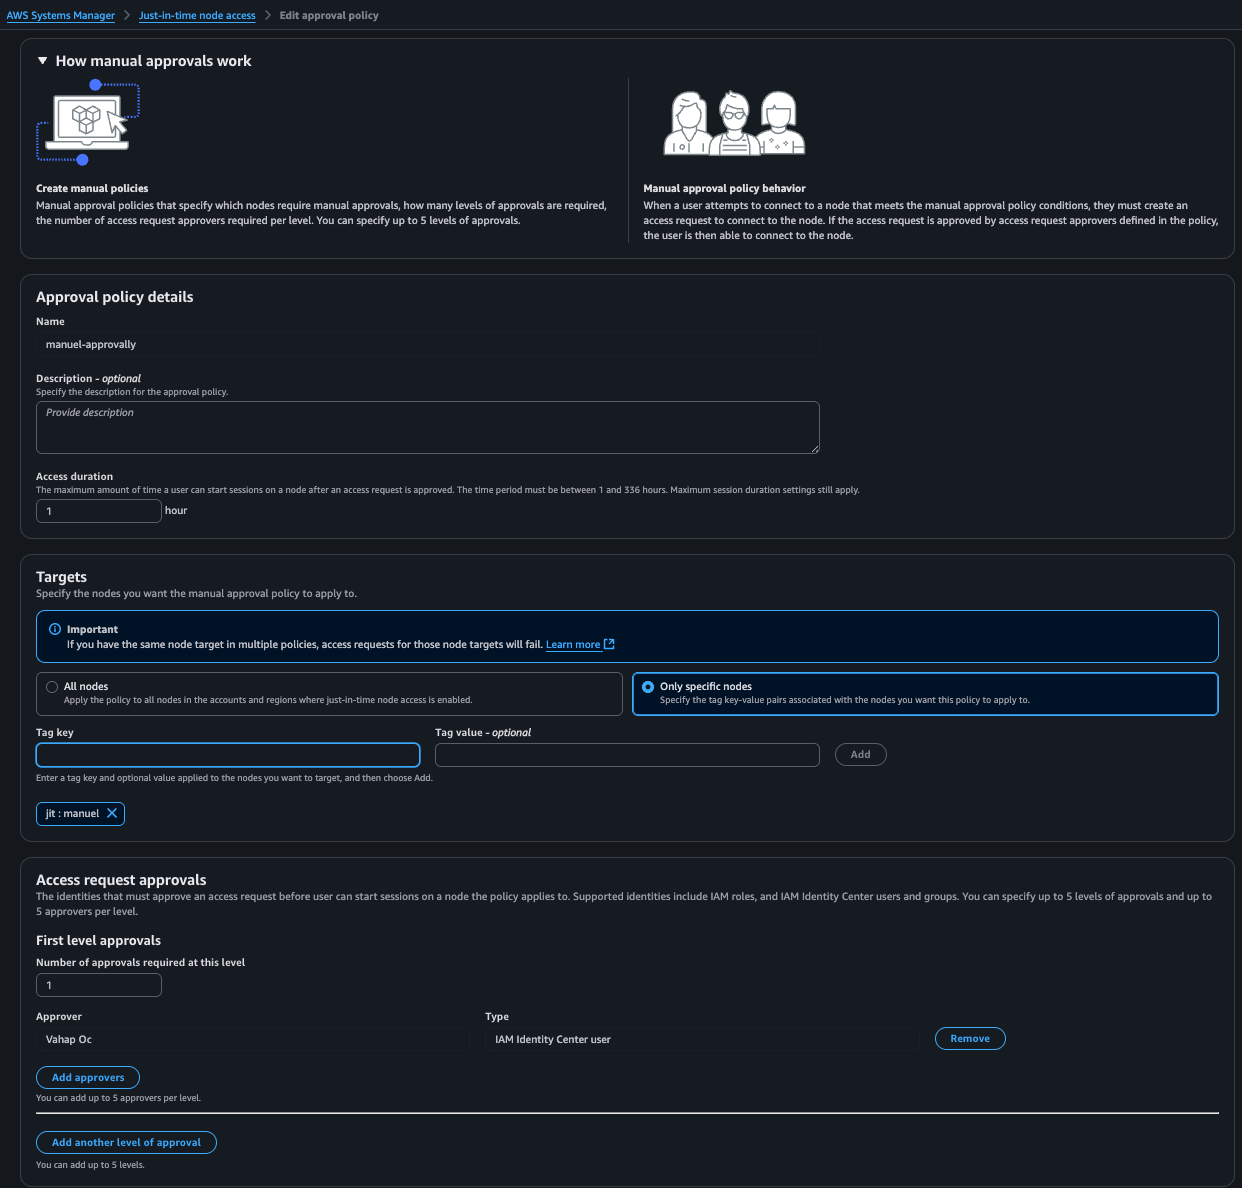
As in the scenario in my setup, if you have SSO integration at the organization or account level, you can assign “Approver” users or groups. The group or list is pulled directly from SSO. Another option is to use IAM. In this case, you can define a role as the Approver. You can then grant your users the authority to assume this role and connect through it. For Slack or Teams notifications, it is recommended to proceed with this method.
As you can see below, two types of notifications can be delivered. Along with filling out this information correctly, it is important that you keep your Slack session open in the browser. When you click Configure channel, it will redirect you to Slack and request approval for Q Developer integration.
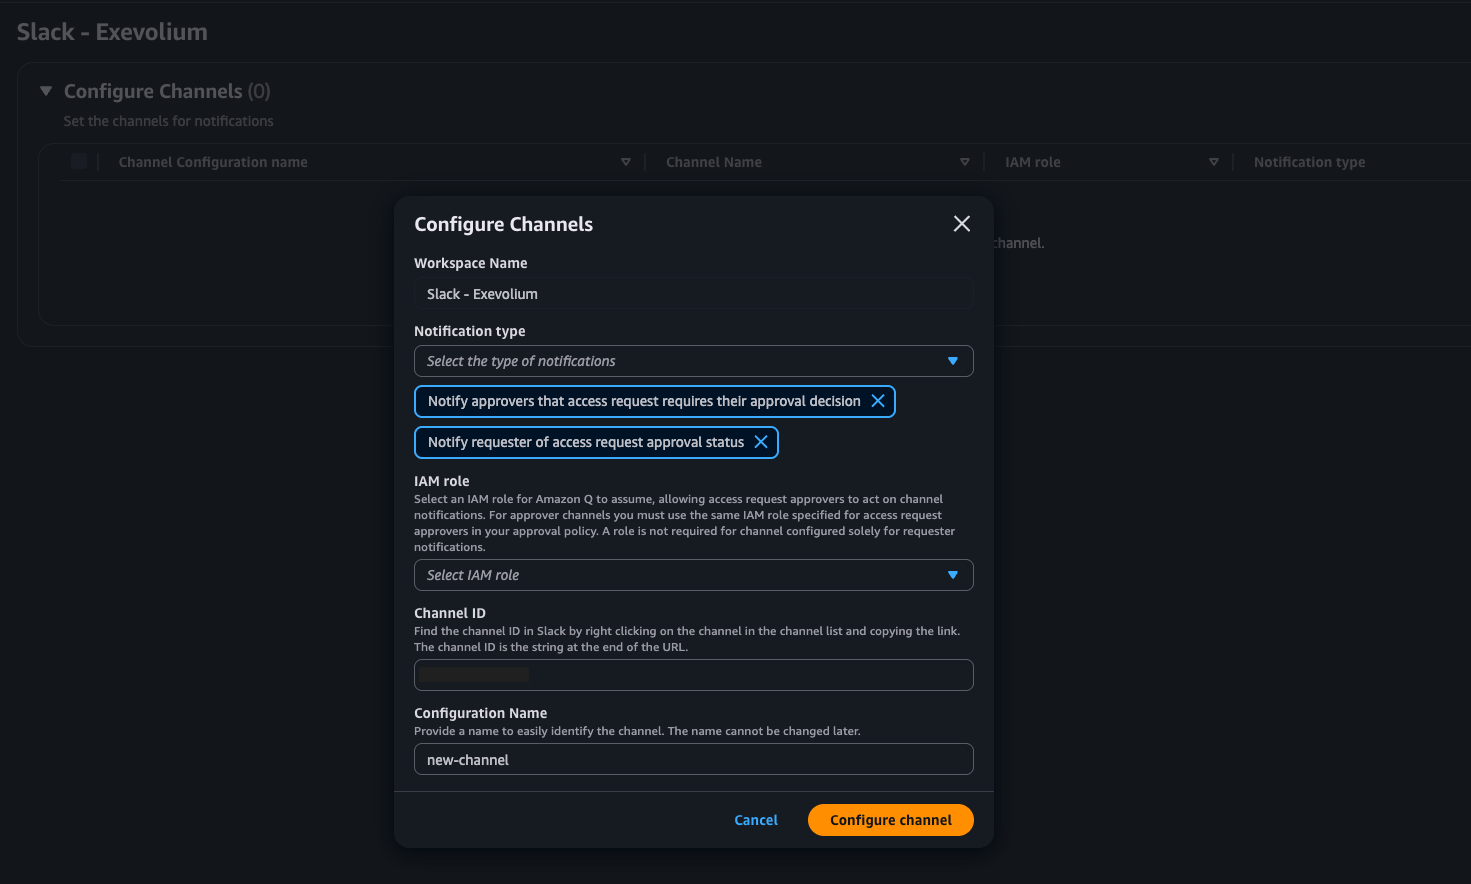
If you need more information about Slack or Teams integration, you can check the references section.
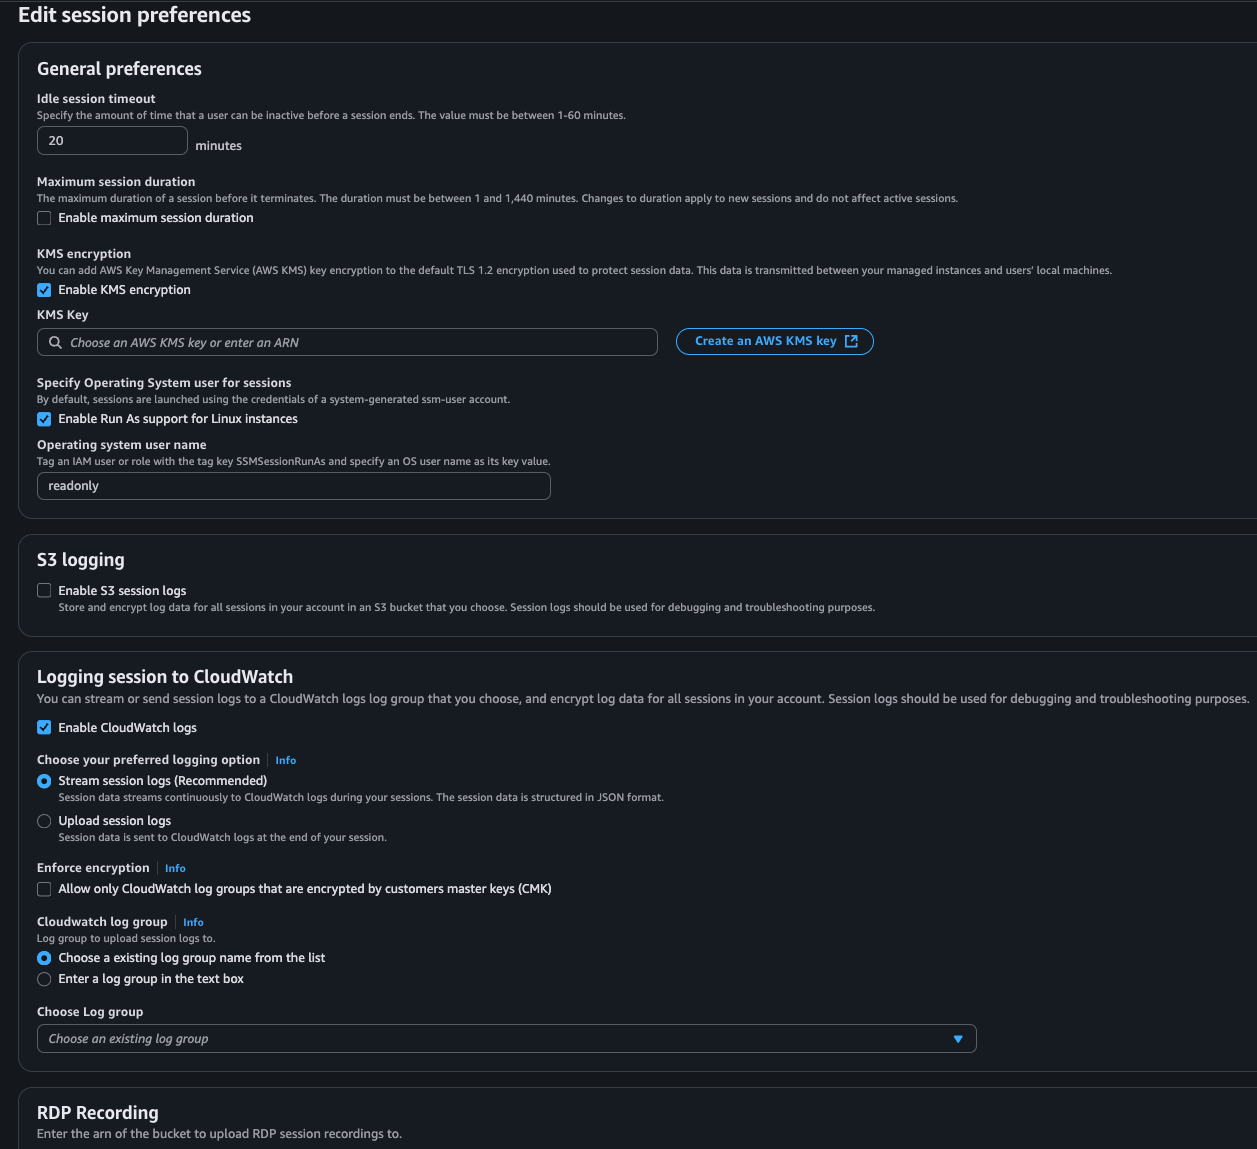
Session Options
As you can see in the two screenshots below, there are settings such as adjusting the timeout duration of an existing session, encrypting its connection (with KMS), or changing the Run As user on the Unix/Linux side. For this, the relevant user must exist on the server side and also be associated on the IAM side.
At the same time, you can configure the logging of all session information into S3 and CloudWatch Logs.
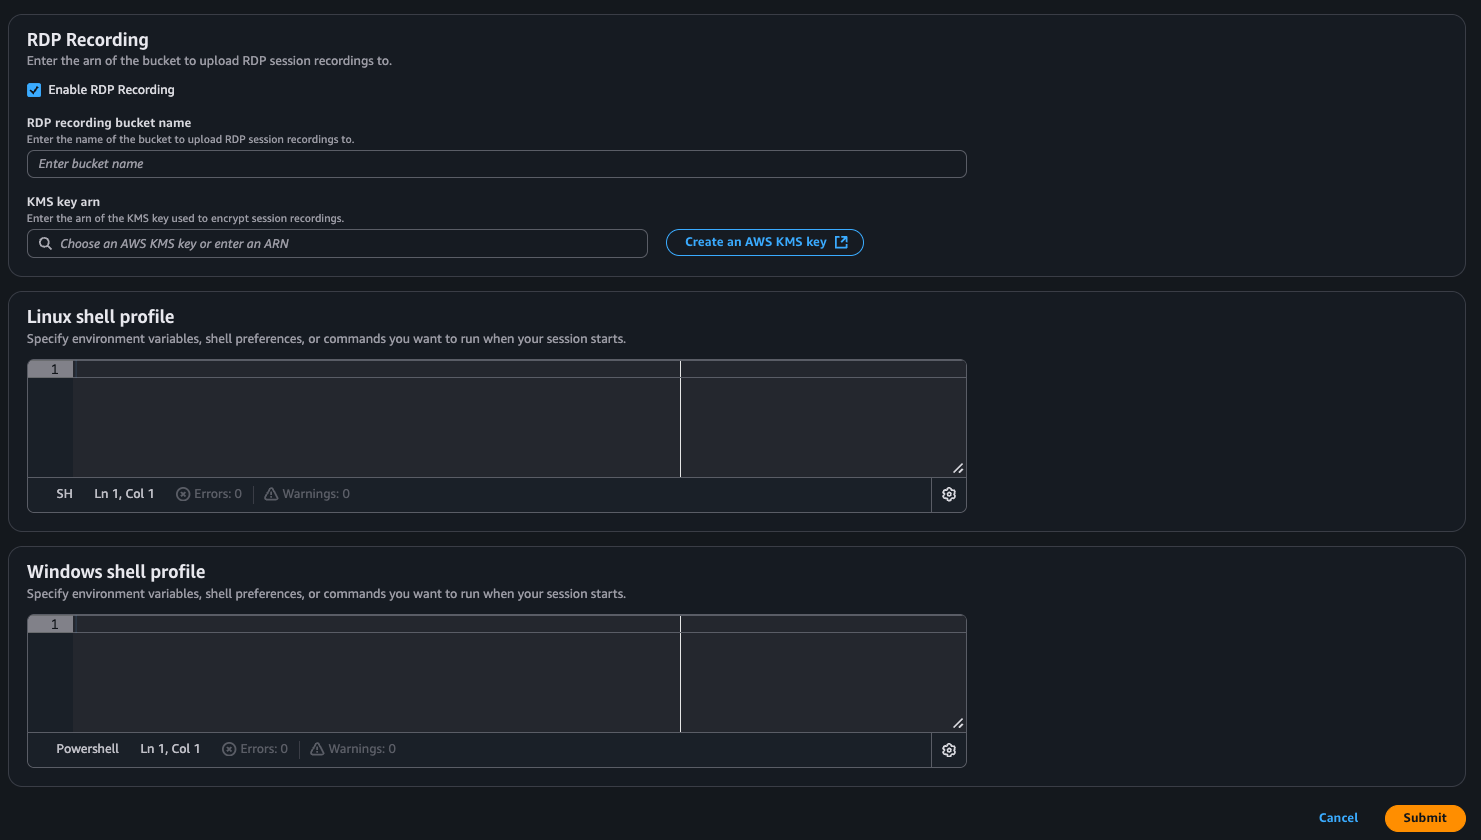
Another feature I enjoy using is shown below. If you have Windows servers in your environments, recordings of the session can be captured in .mp4 format, and these can be uploaded in encrypted form to the designated S3 bucket.
Linux and Windows shell profiles are particularly beneficial for regulation and compliance. For this reason, you can use a standard profile at the start of each session.
In this way, we have completed our default settings. After this point, we have two remaining steps:
- Install the SSM Agent on all servers that do not have it installed, and if your environment is on AWS, assign the relevant IAM role. This role must include at least the AmazonSSMManagedInstanceCore policy.
- Define the approval policies.
If you don’t know how to perform the first step, you can click on this link for Ubuntu and other operating systems.
For the second step, the approval policies, you should come to this section on the same page:
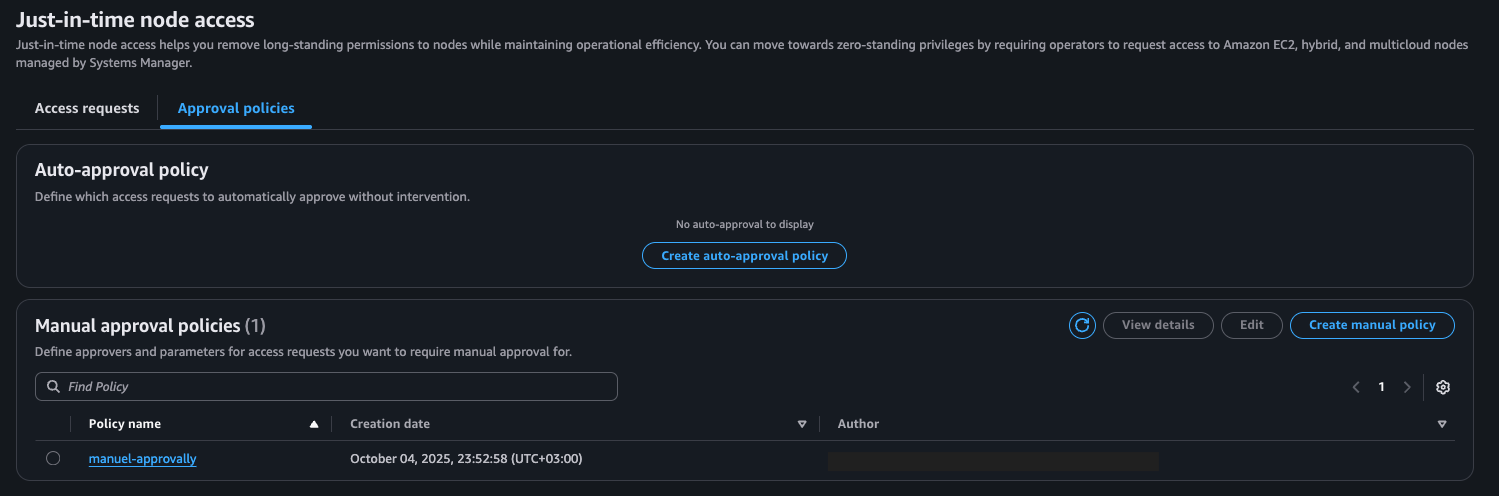
Supported policy types:
JITNA supports three distinct policy types to manage access requests:
- Auto-Deny (organization-wide): This policy type is designed to automatically deny access requests. It can only contain forbid instructions, e.g. any resource tagged as “Prod”. At the same time, if you do not define any policy, the automatic rejection policy will be activated.
- Auto-Approve (one per account and region, but can be have multiple permit instructions): This policy automatically approves requests from any principal belonging to the “Security” Group.
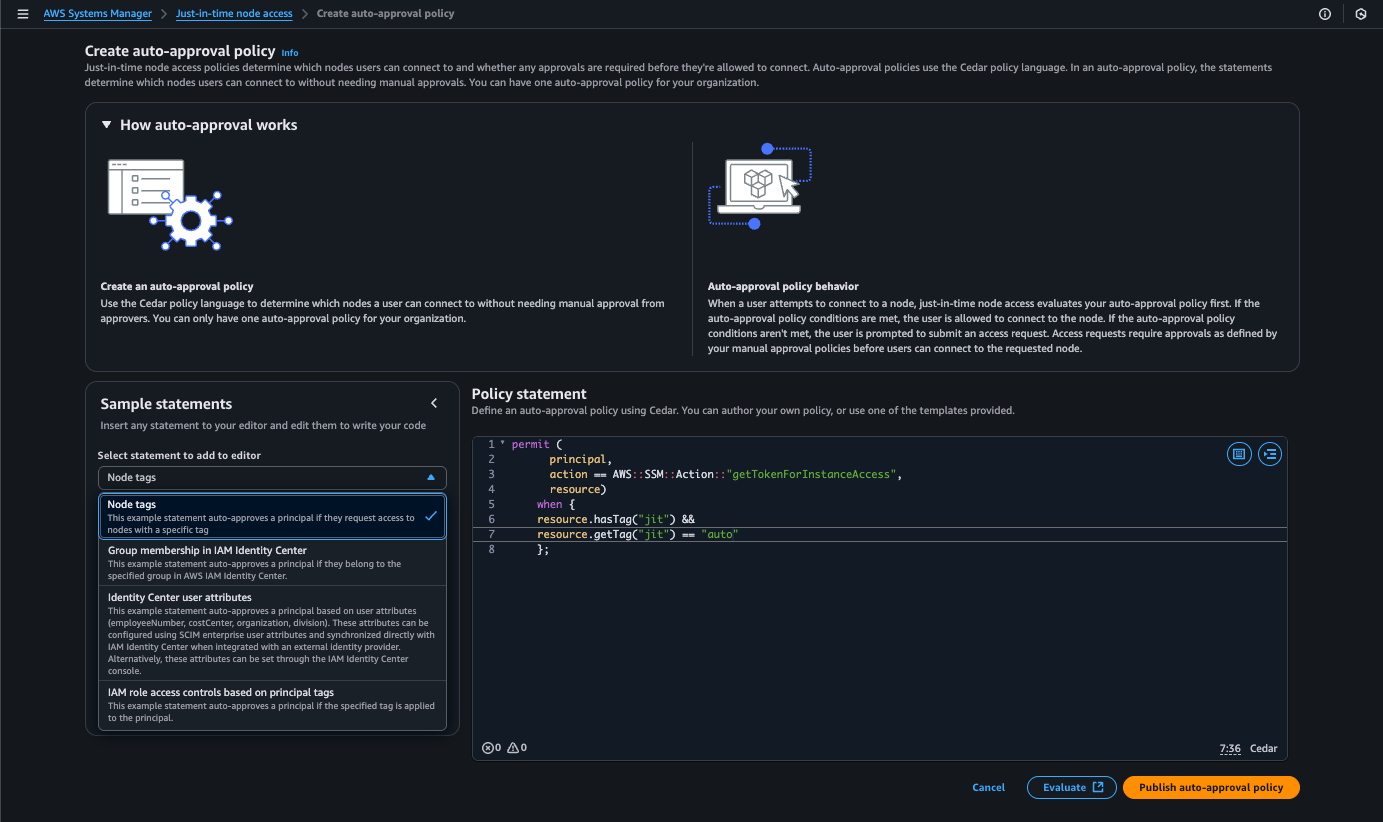
Note: Once an auto-approved request is granted, it cannot be canceled or revoked by an administrator or the requestor. Access is granted for fixed start and end times, with a one-hour timeout automatically applied from the time of approval.
- Manual-Approval (account and region specific, with a limit of 50): This policy is used when neither auto-approval nor auto-deny rules apply. Requests are sent to designated decision-makers for manual review and approval. This policy can be applied to all or specific nodes.
Overlapping Policies:
When policies overlap, their interaction determines the outcome:
- If two manual approval policies overlap, the request will be DENIED.
- If an auto-approval policy is present and overlaps with a manual-approval workflow, the request will be APPROVED.
After discussing all the steps, let me point out that you need to remove the “ssm:StartSession” permission from the users in your environment. Otherwise, users can start a session both from the AWS CLI and the console without submitting a request.
The permission policy for the users who will make requests should look like this:
{
"Version": "2012-10-17",
"Statement": [
{
"Effect": "Allow",
"Action": [
"ssm:StartAccessRequest",
"ssm:GetAccessToken"
],
"Resource": "*"
},
{
"Effect": "Allow",
"Action": "iam:PassRole",
"Resource": "arn:aws:iam::*:role/SSM-JustInTimeAccessTokenRole",
"Condition": {
"StringEquals": {
"iam:PassedToService": "justintimeaccess.ssm.amazonaws.com"
}
}
},
{
"Effect": "Allow",
"Action": [
"ssm:CreateOpsItem",
"ssm:GetOpsItem",
"ssm:DescribeOpsItems"
],
"Resource": "*"
},
{
"Effect": "Deny",
"Action": "ssm:StartSession",
"Resource": "*"
}
]
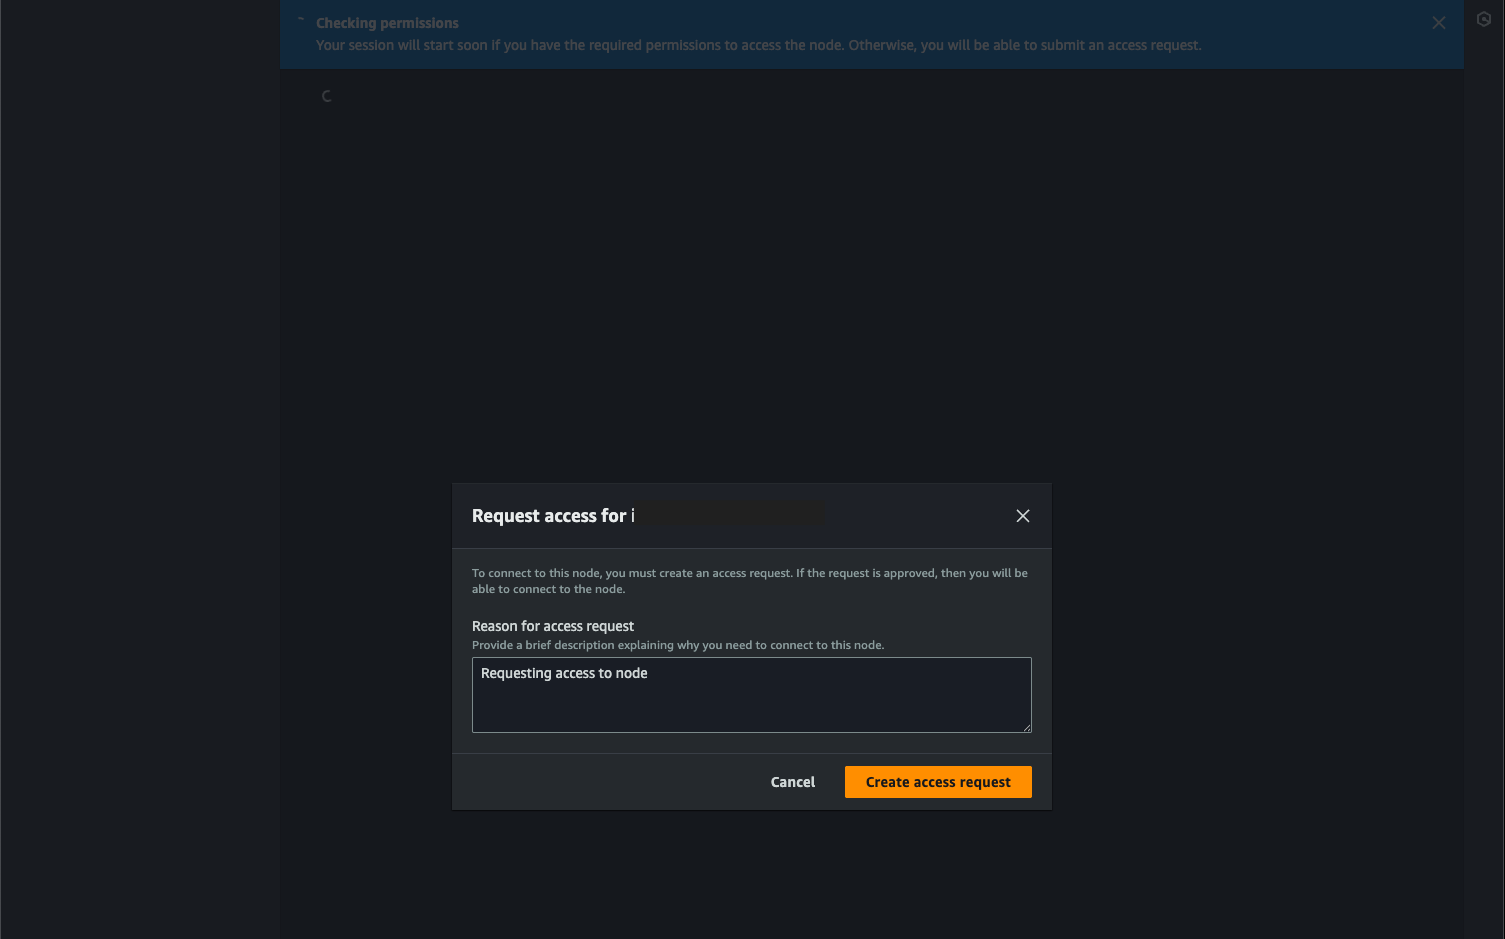
}In this way, no user will be able to start a session without your knowledge, and when they want to initiate one, they will be required to request approval.
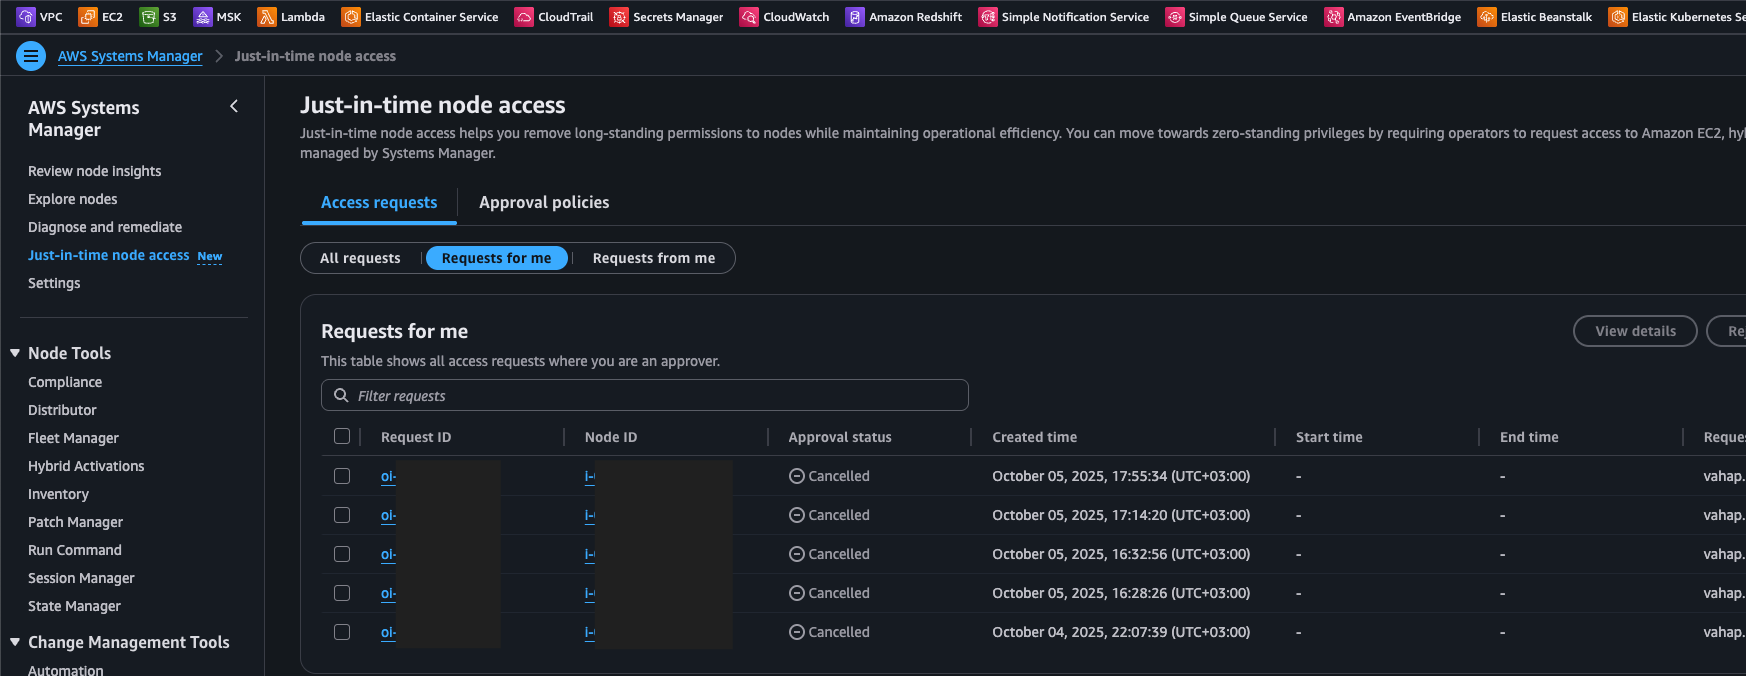
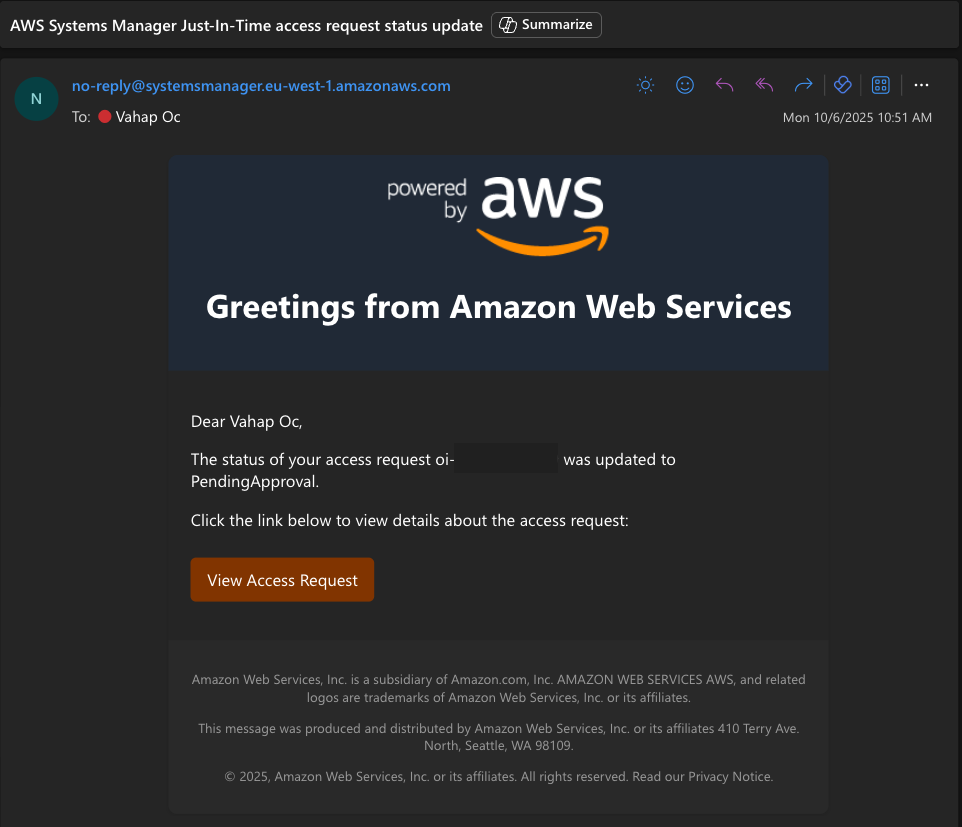
The person requesting approval receives an email as shown below:
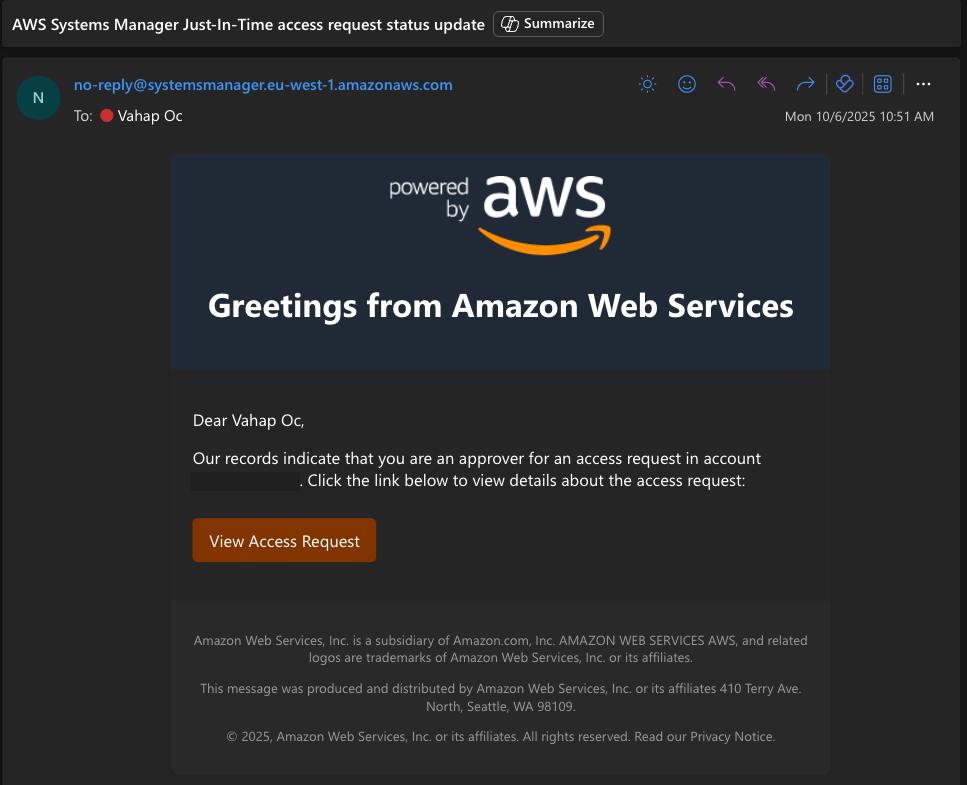
The approver who will approve the request also receives an email as shown below:
If you would like to follow the access request process by sending a request through AWS CLI, the commands are as follows:
aws ssm start-access-request --targets Key=InstanceIds,Values=i-111111111111 --reason "Troubleshooting networking performance issue" --region eu-west-1After approval is received, you can proceed by using the standard aws ssm start-session command.
aws ssm start-session --target i-111111111111 --region eu-west-1Pricing:
Just-in-time node access is priced per node per hour for nodes managed by the SSM Agent. You are billed per node per hour at the hourly rate based on the below table:
| Volume | Price per node per hour |
|---|---|
| First 72,000 hours | $0.0137 |
| Next 647,999 hours (72,001 hours to 720,000 hours) | $0.0103 |
| Next 6,479,999 hours (720,001 hours to 7,200,000 hours) | $0.0034 |
| Hours above 7,200,001 hours | $0.0014 |
Pricing example:
You enable just-in-time node access for an account. That account has 200 EC2 instances which were managed by AWS Systems Manager over the course of a billing period. Each of those 200 AWS Systems Manager managed nodes were managed for 100 hours, resulting in a total usage of 20,000 Systems Manager managed node hours.
All 20,000 node hours are billed at $0.0137/hour, for a total expected billing period cost of $274.00.
I hope these article help save you time.
References: